Are you looking to provide a smooth developer experience with your APIs and as a result maximize API consumption? Then, you can’t really afford to put off API documentation as a last thought. After all, it is one of the critical pieces of any good developer experience program along with platform SDKs, code samples etc.
Who are the end-users of a documentation, really? Humans. So, naturally, your API documentation can only be termed “good quality” if it comes with a human element in it— easy to read, navigate and comprehend. Similarly, a good quality SDK is one which is usable, idiomatic, comes bundled with language-specific documentation and is simple enough to be used by any average developer. This implies that user-friendliness is a key factor in determining the quality of your API developer experience program.
Postman is a tool widely used by developers for API testing and for collaborating over APIs with teams. You can then easily export your API requests in the form of a Postman Collection file and use it to generate complete API documentation as well as SDKs. In this blog, I share a few tips to gear your API documentation and SDKs towards your developers from as early as your starting point — Postman requests and the resulting Postman Collection.
1. Assign a User Friendly and Unique Name to Your Postman Requests
Let’s say you create a new request in Postman Collection and set its URL to something like <a href="http://i-am-just-an-example.com/dummy" target="_blank" rel="noreferrer noopener">http://i-am-just-an-example.com/dummy</a> .

Now, when you proceed to save this request, you’ll notice that Postman sets the request URL as the default name for your request. You can go ahead and save your request without changing this name and Postman won’t complain.
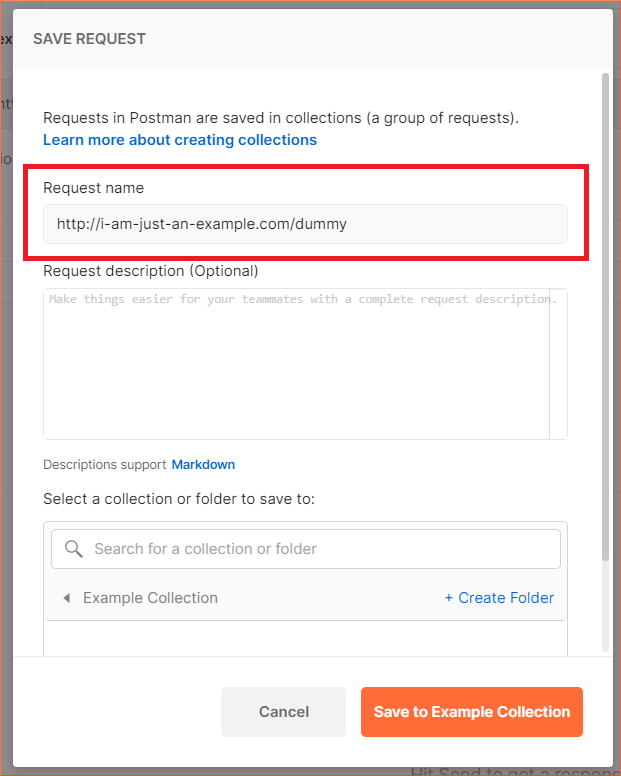
Imagine having 50+ such requests in your Postman Collection, each with a name set as the request’s URL. Look how hard it is to locate a particular request in the left bar or in the documentation preview navigation:
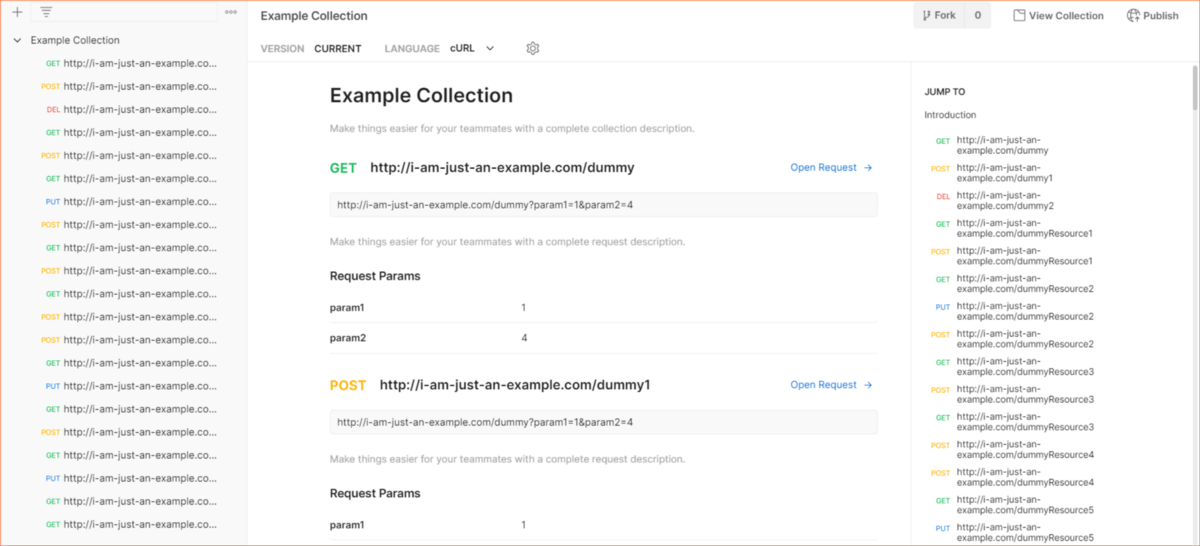
If you, as an API provider, are having trouble looking for a request, imagine how hard it will be for a completely new user looking to consume your API.
So, while Postman sets the request URL as your default name for a request to save you some time, it is highly recommended that you replace those names with ones which are more meaningful, short and user-friendly. Here is an example of APIMatic’s API (ungrouped version) that I imported into Postman which makes better use of request naming:
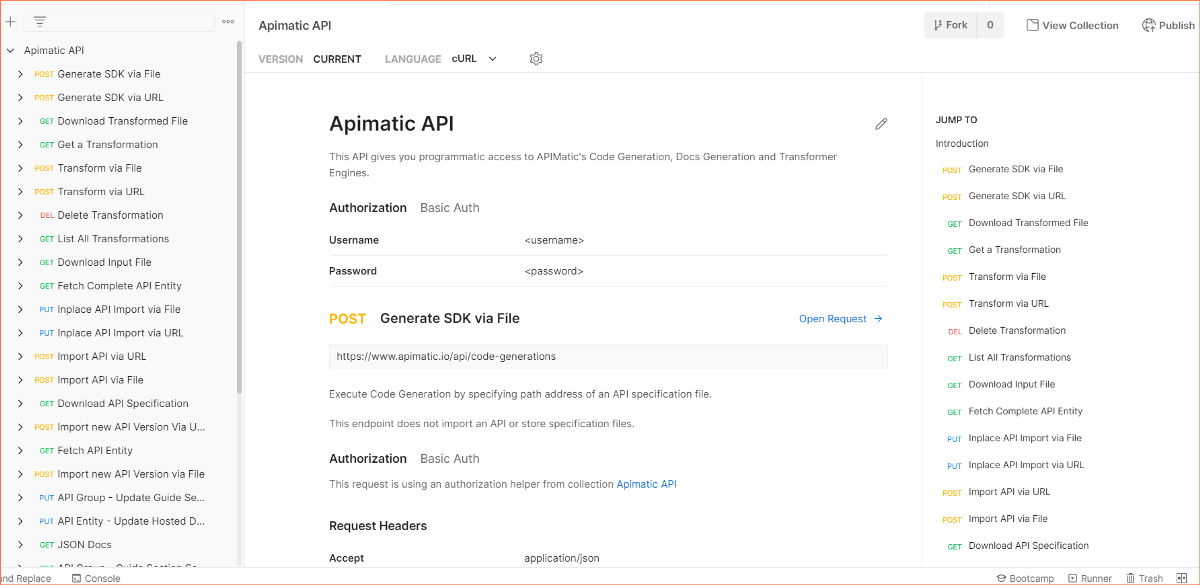
A good request name will, therefore:
- Be short and sweet — ideally less than 30 characters.
- Ideally not contain any special characters/symbols.
- Indicate the API resource you are trying to access/modify e.g. for APIMatic’s API this could be an “SDK”.
- Indicate the action being performed on the API resource e.g. creating/generating an SDK.
Of course, a good name is highly dependent on a good API design as well. However, generally speaking, your request name must at least clearly indicate to the user what he/she can achieve upon making this request.
2. Increase Discoverability — Group Related Requests
In the previous section, you saw that the requests were thrown directly into a Collection without any grouping. To improve the developer experience, you need to reduce the time it takes for your users to find a particular request/endpoint. Since Postman supports nesting, you should group related requests into folders. Generally, all requests/endpoints dealing with a particular resource or feature should be grouped together. Here is what the APIMatic’s API looks like after grouping:

3. Add Plenty of Descriptive Content in Your Postman Collections
Your end-users are new to your API and know nothing about your offerings. Therefore, your documentation must be very clear and descriptive about everything. As a starting point, make sure that you have descriptions set for each of the important components in your Postman Collection.
Postman supports GitHub flavored Markdown syntax so you can easily add any kind of descriptive content (lists, images, tables, etc.) pretty much everywhere including (but not limited to):
3.1. API Itself
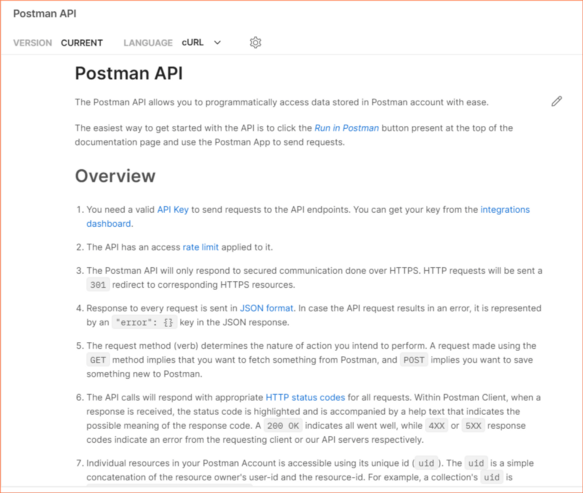
A good place to inform your users what your API offers and how they can quickly gain access to its endpoints. Here is how Postman describes its API in its Postman Collection:
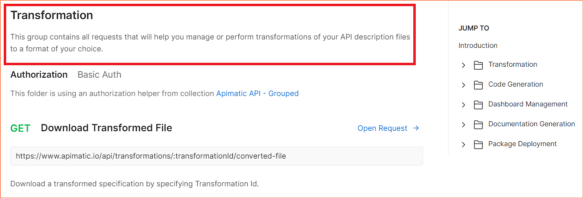
3.2. Folder Level
When you click on a folder in the collection, you can add/edit its description (or documentation for newer Postman App versions). Here you can tell users more about what gels together the requests in this particular folder, e.g., which common feature they target or what common resource they are related to.
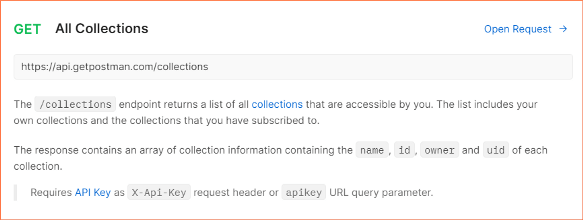
3.3. Request Level
You can save a request’s description when saving/editing the request or later in the documentation section if you are using the latest Postman app. For request descriptions, tell users what the particular request/endpoint is expected to do, e.g., the kind of inputs it will accept and what it will return.
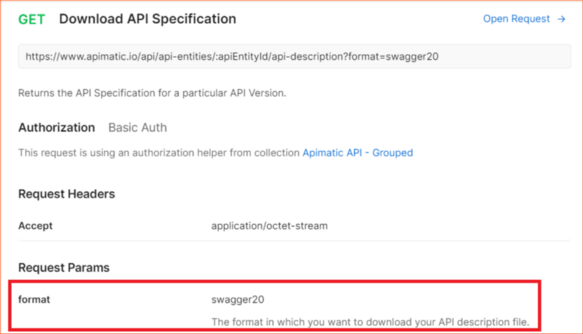
3.4. Request Parameters Level
You can specify descriptions for your request parameters including query parameters and path variables. You can comment about what information that parameter stores and optionally any details related to the expected type of the parameter (a number, object or string, etc.) or any restrictions to its value, etc.
4. Don’t Forget the Examples!
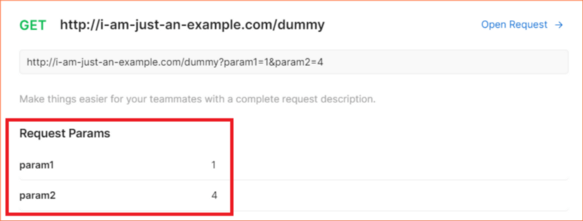
4.1. Request Parameter Values
During an API testing session, you must have provided some input values to the request parameters in order to get the response. If you have saved and published your collection with those values, they will show up in your documentation as examples, as can be seen below:
4.2. Request-Response Examples
Setting request values is not enough for giving a full picture of the capabilities of your particular request to your user. What happens if the user doesn’t send a required parameter? What happens if the parameter value is wrong? What happens if the user doesn’t authenticate the request? Luckily, Postman Collections have a request-response example pair feature where you can represent these scenarios easily. It is a bit hidden in the Postman app so it is quite likely that you probably missed it before. Click on the three dots next to the request’s name and choose “Add example”:

OR you can also save an example when you receive a response from your request in Postman, using the “Save an example” option:

Remember, that these examples are essentially request-response pairs which means that each response is tied to a particular request. To make the best use of this feature, there are a few things to keep in mind:
Examples Should Cover All Possible Response Status Codes
Ideally, your examples should cover all possible response status codes that your API request can return e.g. success codes in the range 2XX and error codes in the ranges 4XX and 5XX.
Assign Unique Identifiers
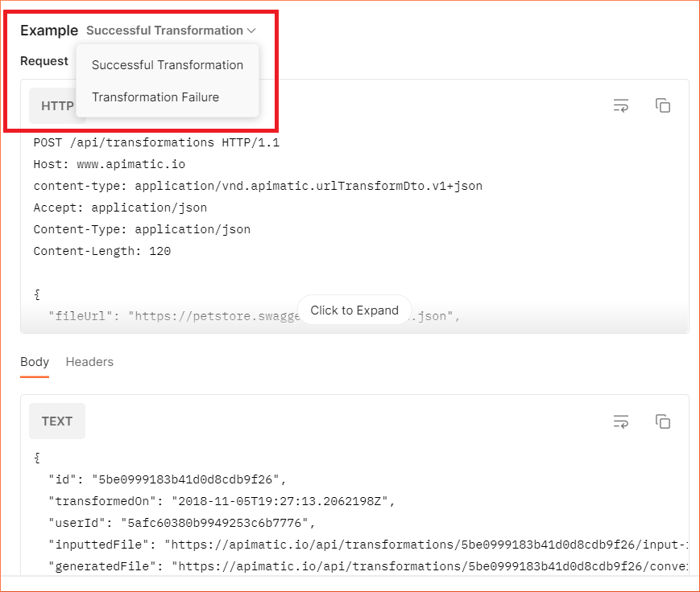
Don’t forget to assign a short meaningful identifier to each request-response example pair. The identifier should summarize what scenario this example represents e.g. a success/error case. Postman groups together the examples tied to a particular request using these identifiers as you can see below:
5. Setup Authentication Properly
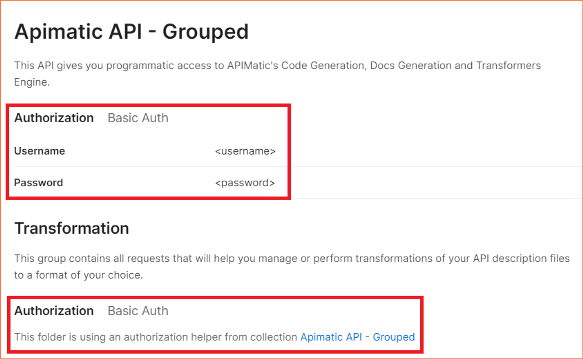
For API testing, many developers tend to pass the Authorization header directly for authenticating their requests. This is not recommended unless you have a really custom authentication flow. Postman natively supports various authentication types that can be applied globally at API level and can also be overridden in individual requests e.g. OAuth 2.0 flows, Basic authentication, API keys etc. Setting up the right authentication flow for your API and requests within Postman helps configure your Postman Collection correctly. This in turn improves the documentation by enabling documentation generators to generate relevant authentication sections as shown below:
Taking Your Postman Collection Beyond API Documentation via APIMatic
APIMatic offers a customizable developer experience solution that comes bundled with rich features like SDKs, reactive code samples, API explorer, API description transformations and much more beyond simple API docs. If you are looking to generate your API documentation and SDKs in APIMatic from a Postman Collection, there are a few additional trips and tricks to improve the quality of generated documentation:
Make Your Request Names Code Generation Friendly
Since APIMatic’s documentation comes bundled with language-specific features like SDKs and reactive code samples in addition to the HTTP reference documentation, we expect users to take extra care of request naming conventions. This is because the request names from your Postman file are used for generating controller names and SDK components as part of the portal generation process. Therefore, names that are too long (greater than 50 characters) or use special characters are not recommended.
Tweak Imported Models If Necessary
A unique feature of APIMatic is that we infer complex models from your request/response example values (at the time of importing the Postman Collection) to improve your experience with our SDKs/portal. To ensure that the models generated are a true representation of your API, here are a few additional recommendations:
- Examples must be valid and thorough
The examples provided in the Postman Collection must be valid, thorough and ideally cover all possible properties in case complex objects are involved.
- Fine-tune model information that can’t be deduced from examples
Deducing models from examples may not always result in complete type information and may also not be 100% accurate every time. For example, it is not always apparent whether a particular property in the object is required or optional, whether a numeric property allows only integers or bigger values like long, double as well, etc. This is one big reason why formats like OpenAPI, RAML, and others have a proper type system which Postman does not have. However, after your models are imported, you can always fine-tune them in APIMatic’s API editor to get the same behavior.
- Deduplicate models
Since it is quite possible that two different components have very similar examples, therefore, the generated models may be, e.g., a subset of each other. While detecting this during the import process is not exactly possible, you can, however, deduplicate the models in the editor after the import process to improve the quality of the output documentation/SDKs.
- Improve generated model names
The names of the generated models are assigned based on the names of the component for which the example was provided. To prevent model name duplication in such cases, a number may be appended with the model names. For example, if you have a parameter named “status” in two requests A and B where both these parameters have different examples, it is possible that the generated models from these examples can end up with names like “status1” and “status2” respectively. To improve the output for such cases, you can upload our Metadata file along with your Postman Collection in the form of a ZIP file during import, with the “AppendParentNameForClashes” import setting enabled. As the name suggests, this will append the parent component’s name instead of a number at the end of the model name which will add more context and improve the overall output.
Upload Environment Files
If your Postman Collection makes use of environment variables, it is highly recommended that you upload your environment files along with your Postman Collection in the form of a ZIP file at the time of importing your file into APIMatic. These variables have no meaning in an API documentation, therefore, providing these files will help us resolve their values and display them properly.
Add Markdown Guides
Once you generate the API documentation in APIMatic from your Postman Collection, feel free to add additional quick-start custom Markdown guides.
Generating Documentation from Postman Collection in APIMatic — A Quick Demo
Generating documentation in APIMatic involves a few quick steps which are explained below:
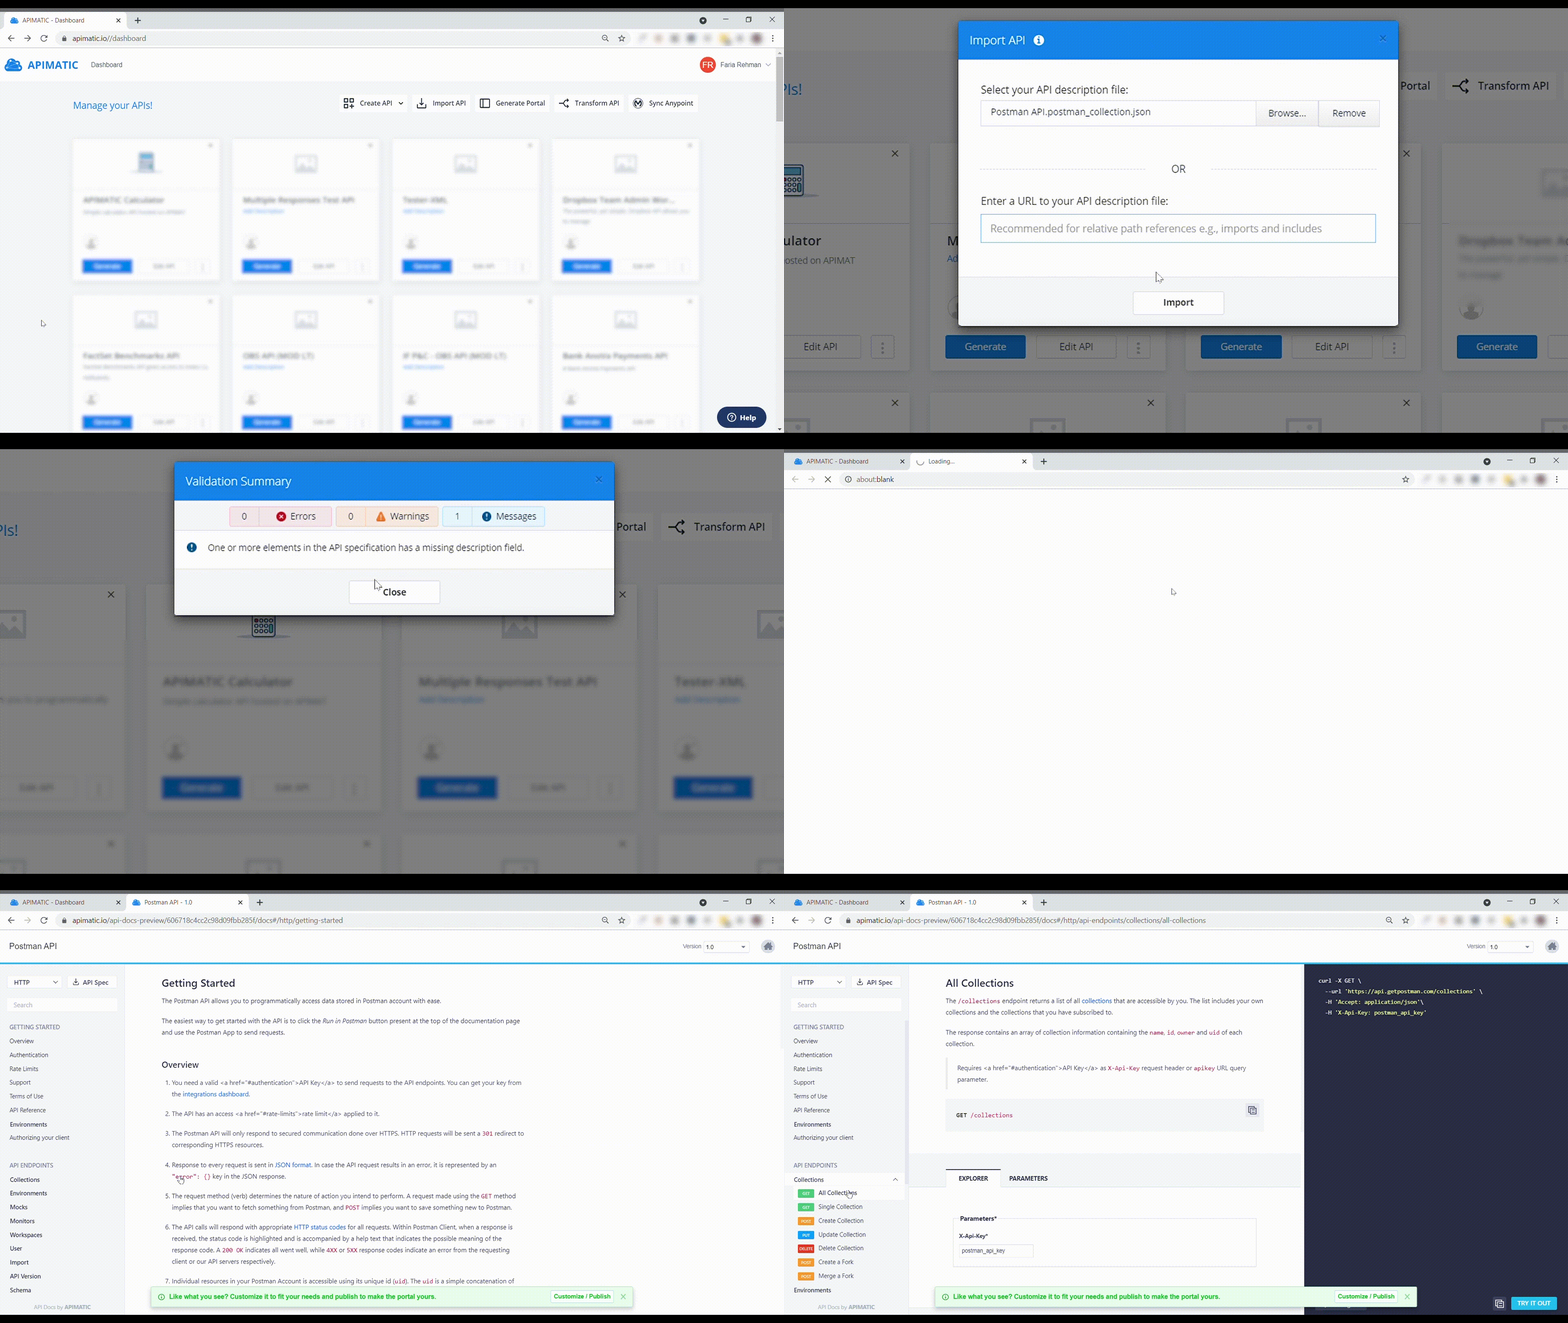
- Sign up to APIMatic, if you haven’t already.
- Import your Postman Collection to the APIMatic Dashboard by either uploading the file from your local system or providing a public URL.
- Your file will be validated. If there are any errors found during validation, you may need to resolve the issues before proceeding ahead.
- Once your file gets imported, click on the “Generate” button on the imported API entity.
- Click on “Preview API Portal”.
- You will then be taken to the preview of your portal.
From there onwards, you can play around with your portal, generate SDKs or publish and customize the portal to suit your needs better. Please check out our documentation on generating feature-packed API documentation to learn more. Happy documenting!


