Recently, there has been a lot of talk around GitHub Actions, and the wide range of features it can offer with just a simple YAML based workflow file!
What are GitHub Actions?
GitHub Actions connect all of your tools to automate every step of your development workflow. Easily deploy to any cloud, create tickets in Jira, or publish a package to npm. If you want to understand how GitHub actions work and how to set up existing actions from the GitHub marketplace then you should look at this guide.
In this article, we will use a GitHub Action for API Transformer for transforming APIs to the supported formats by APIMatic.
What is APIMatic Transformer?
APIMatic Transformer allows its users to convert between different API description formats e.g. Swagger, RAML, etc. This enables the user to benefit from a wide range of tools available associated with any format, not just one.
APIMatic Transformer GitHub Action
We at APIMatic have created a GitHub action for our users that lets them use APIMatic Transformer through a GitHub action available on the GitHub marketplace to help them establish CI/CD pipelines and automate their workflows.

How does it work?
This GitHub Action uploads and converts any API Specification into one of the supported formats listed here, The user just need to use the GitHub action in their repository on GitHub and provide the API Specification URL and export format as the arguments to the action. It provides the URL to the converted API specification in the format specified by the user.
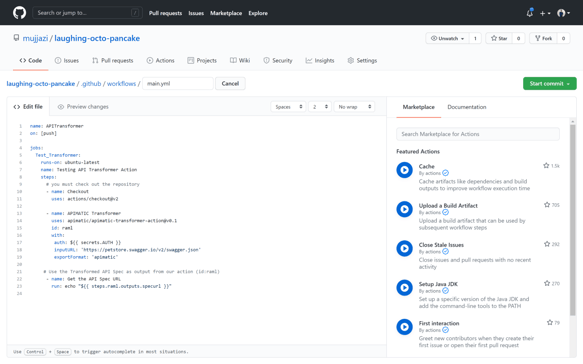
Here is an example workflow file that explains how you can use it with your GitHub repository:
steps:
      # you must check out the repository
      - name: Checkout
        uses: actions/checkout@v2
      - name: APIMatic Transformer
        uses: apimatic/apimatic-transformer-action@v0.1
        id: transform
        with:
         auth: $
         inputURL: 'https://petstore.swagger.io/v2/swagger.json'
         exportFormat: 'raml'
     # Use the Transformed API Spec as output from our action (id:transform)
      - name: Get the API Spec URL
        run: echo "$"
Now let me explain how this is working by directing each of the above-mentioned steps.
We are using steps: to let actions know that we are creating a step below with the name Checkout
We are using uses: actionscheckout@v2 which means that our step Checkout is using another action called checkout that checks out the current repository and uses it.
Then we have the Transform API Spec step which is actually transforming the API Spec. Here apimatic-transformer-action is the name of the action, and id:transform is just a unique id assigned to this step so we can use output generated through this step in later steps. We are passing auth: $ that actually uses the secret Test stored in the current repository’s secrets, It is recommended to create an encrypted secret for the APIMatic API token (auth).
How to create a Basic Authorization token using your APIMatic account?
- You need to sign up for APIMatic here using your company email address.
- Purchase subscription for APIMatic as per your relevant requirement, details of pricing are mentioned here.
- Visit Basic AUTH generator, Enter your email and password to generate the Basic Authorization token which will look like this: Authorization: Basic dGVzdEB0ZXN0LmNvbTpyYW5kb20=
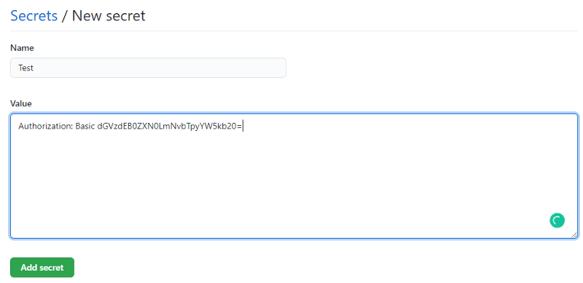
- Now visit the repository on GitHub where you want to use this GitHub action, Select settings > secrets and Add a new secret and fill in the details as shown below:

We are also passing inputURL and exportFormatas the other arguments for this step and they are corresponding to the API Specification URL and the required format by the user.
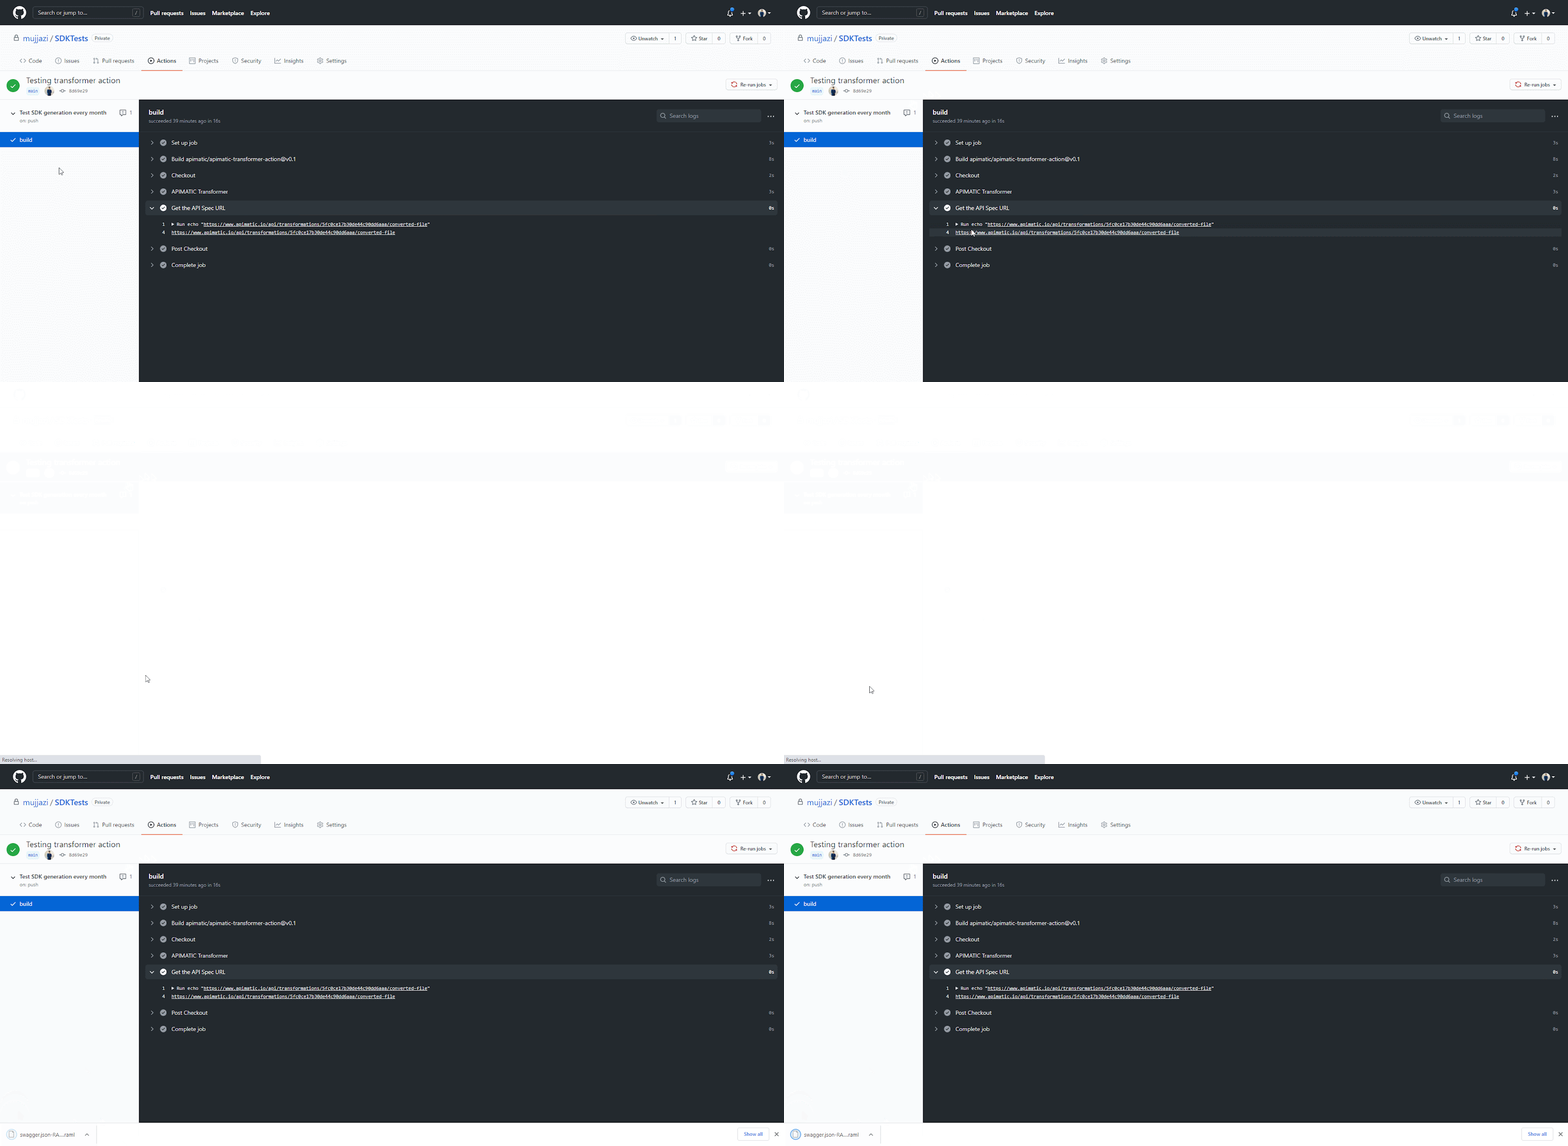
In the last step, we are just getting the URL for the generated API Spec in the required format so we can download it and use it as required.
Here is a complete workflow file with multiple steps generating different formats of API using the same APIMatic Transformer GitHub action:
name: APITransformer
on: [push]
jobs:
  Test_Transformer:
    runs-on: ubuntu-latest
    name: Testing API Transformer Action
    steps:
      # you must check out the repository
      - name: Checkout
        uses: actions/checkout@v2

      - name: APIMatic Transformer
        uses: apimatic/apimatic-transformer-action@v0.1
        id: raml
        with:
         auth: $
         inputURL: 'https://github.com/mujjazi/apimatic-transformer-action/blob/master/bookingpal.json'
         exportFormat: 'raml'
     # Use the Transformed API Spec as output from our action (id:raml)
      - name: Get the API Spec URL
        run: echo "$"

      - name: APIMatic Transformer
        uses: apimatic/apimatic-transformer-action@v0.1
        id: wsdl
        with:
         auth: $
         inputURL: 'https://github.com/mujjazi/apimatic-transformer-action/blob/master/bookingpal.json'
         exportFormat: 'wsdl'
     # Use the Transformed API Spec as output from our action (id:wsdl)
      - name: Get the API Spec URL
        run: echo "$"
After adding all these details, save the main.yml file and commit the changes to the repository.
Now we will make some changes to our API Specification and commit those changes to the repository so that this action is triggered and generate the URL to download the updated API Specification in the required format as shown below:

Summary
The GitHub actions are definitely going to be useful in the long term specifically with respect to the CI/CD benefits they offer and it can be really helpful for those maintaining API Specifications on GitHub. With the advancements in technology, you have to make sure that you are equipped with the latest tools for automation and CI/CD so that you can keep up with the market competition and ensure faster release times with excellent quality.
We have created this action as per the requests from the customers that they need to use APIMatic Transformer with GitHub actions, Stay tuned and we will be offering more features through GitHub actions in the future.
Feel free to use this action and share your feedback, you can always reach out to our team to discuss further regarding APIMatic and its products.


