Share:

.svg)
.svg)


This blog is the third part of the series called “API Transformer Recipes”. The series aims to highlight numerous ways in which developers can integrate API Transformer into their workflow in order to gain access to a wide range of tools and frameworks. Hopefully, it will help eliminate any assumptions that they have about being restricted to a particular set of tools just because they use a certain API specification format.
So your organization decided to use IBM API Connect as their API Management platform. You realize it accepts only OpenAPI or WSDL files while you’ve already spent a long time designing the APIs in API Blueprint (or RAML or any other format for that matter). What can you do? This blog provides a step-by-step guide for importing API description files into IBM API Connect without being limited to only OpenAPI or WSDL files.
What is IBM API Connect?

In case you have never heard of IBM API Connect, it is essentially an API management platform providing great many tools for managing complete API lifecycles. It allows you to create, test, share, monitor and secure your APIs all in one place.
Importing an API into IBM API Connect
Prerequisites
- You must have an account on IBM Cloud.
- API Connect service instance must be up and running. If you are new to API Connect, you can create an instance here after providing required details like service name, region, organization, etc.
Step 1: Open API Connect Dashboard
- Login to API Connect here using your IBM Cloud account.
- From the sidebar, navigate to “Existing services” under the API Connect section of the Overview page.
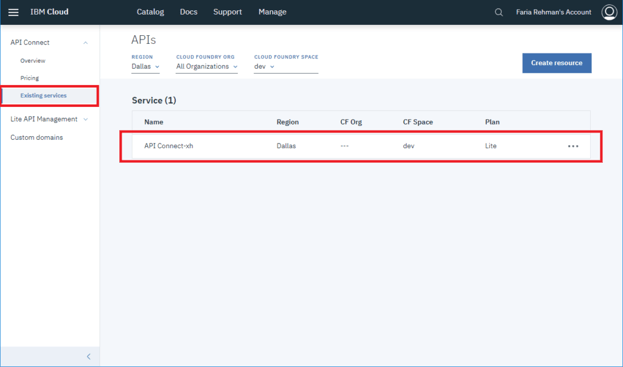
3. Your service instance would be listed here. In case you are unable to view it, ensure that the correct region, organization etc. is selected based on what values you provided at the time of creating the instance. Double click on the instance name and you will be taken to your Dashboard.
Step 2: Navigate to the APIs Section
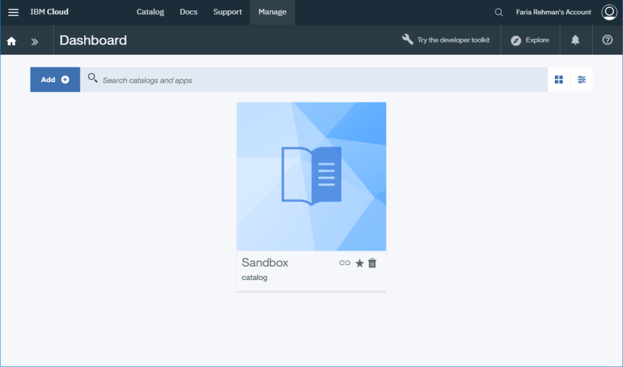
The Dashboard is where you manage APIs. The main page will show you a list of catalogs (a “Sandbox” catalog by default) that helps separate Products and APIs for testing.
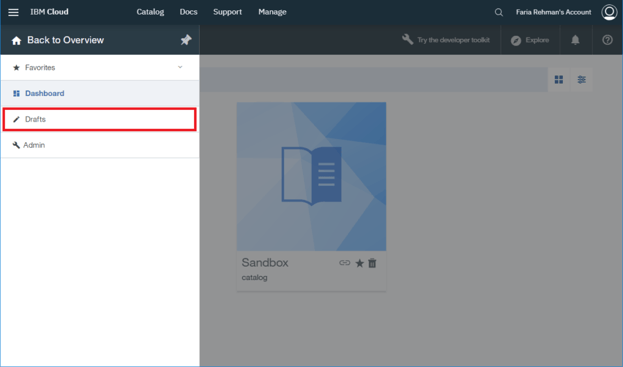
To add new or manage existing APIs, navigate to the “APIs” section as follows:
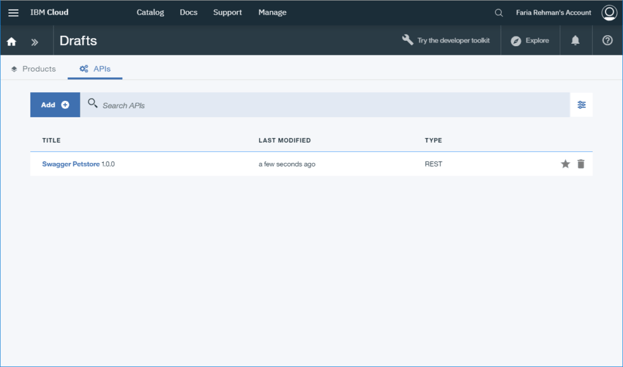
- Open the side navigation bar and click on “Drafts” to open the Drafts section.
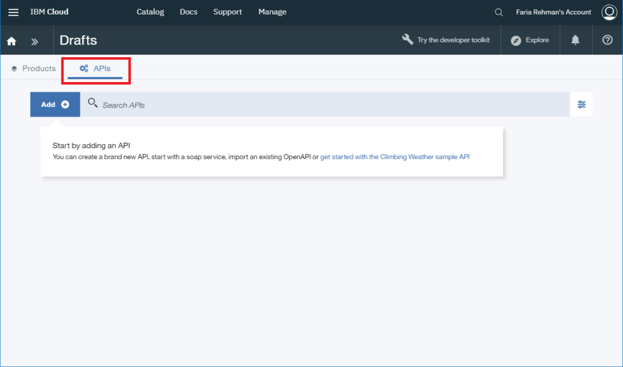
2. Open the “APIs” tab.
Step 3: Obtain IBM Compatible API Specification Using API Transformer
IBM platform supports only two API description formats: OpenAPI (v2.0, v3.0) and WSDL (for SOAP based services). So to import your API into IBM you will first need to convert your existing API specification into one of these formats. For this, you can use API Transformer as described below:
1. Navigate to API Transformer. Sign up if you haven’t already.
2. Once you are logged in, upload your API description file or provide its URL in the “Convert Now” section. The file that you provide must be in one of the supported formats listed here. All popular format choices like API Blueprint, RAML, WADL, etc. are supported.
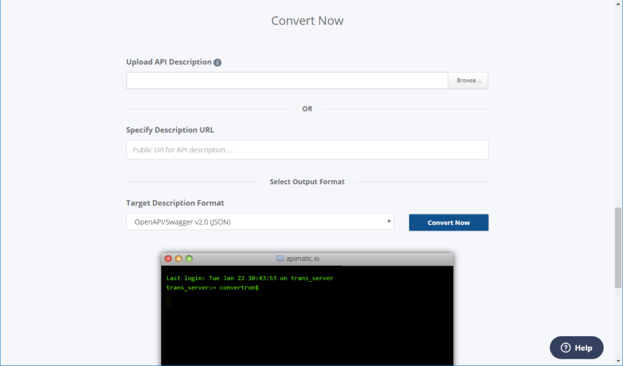
3. Choose a target description format based on your needs. Select “Web Service Definition Language (WSDL) — W3C” if you are aiming to create a SOAP based service. For all other cases, select “OpenAPI” (JSON or YAML). You will notice two versions listed for this format (v2.0 or v3.0). Pick any since IBM supports both.
4. Click on “Convert Now” and if the transformation succeeds, you will be shortly prompted to download the converted file. Save it locally on your system.
Depending on your needs, you may prefer to perform the above steps via the API instead, that allows you to integrate API Transformer easily into your workflow.
Step 4: Import the API into API Connect
Now that you have an IBM-compatible API description file, you can proceed to import your API into the API Connect Dashboard.
For an OpenAPI file
1. In the APIs section click on “Add” > “Import API from a file or URL”.
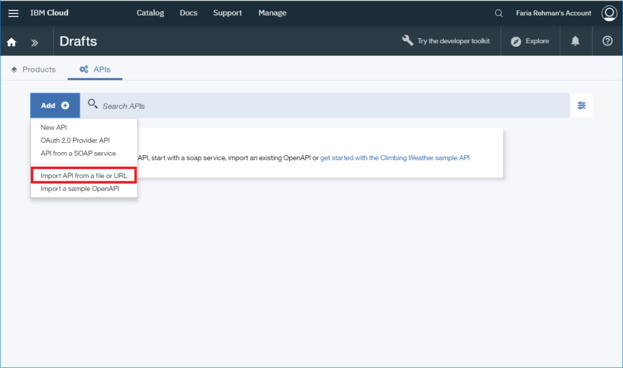
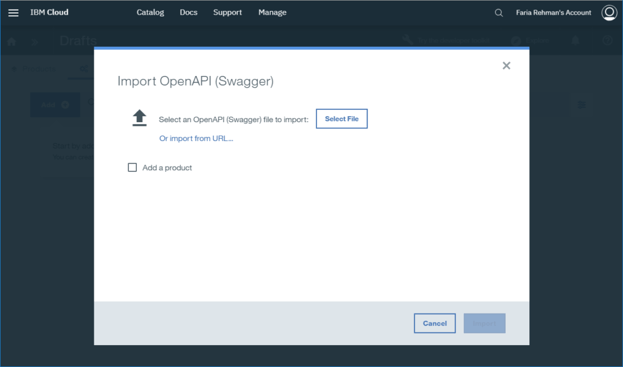
2. Upload the converted OpenAPI file obtained from API Transformer and click on “Import”.
For a WSDL file
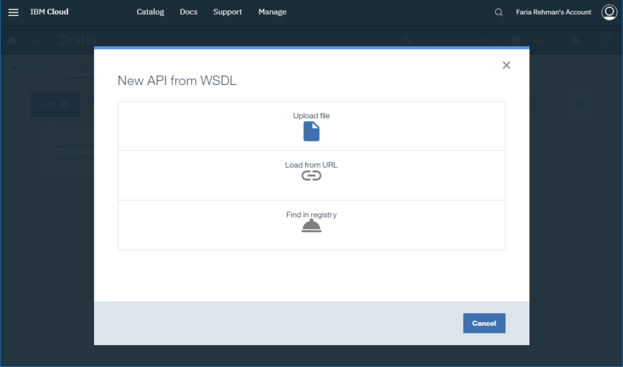
1. In the APIs section click on “Add” > “API from a SOAP Service”.
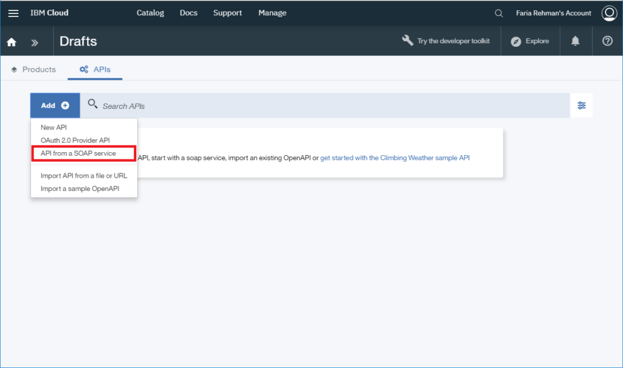
2. Upload the converted WSDL file obtained from API Transformer and click on “Import”.
If your file is imported successfully, it should now be visible in the APIs list.
Step 5: Finalizing the Imported API
This is an optional step suggesting some tweaks to the imported API to make it more compliant with some of the basic IBM requirements. It will help you avoid any issues that could appear later on while managing/publishing the API.
Open the imported API by clicking on the API name in the APIs list.
Use only HTTPS Scheme
IBM enforces that APIs use only “https” as the scheme. You will need to enable it if the imported API does not use any scheme by default. And if your API allows for any additional schemes, you will need to disable them all.
1. Ensure the tab open is “Design” and then navigate to the “Schemes” section.
2. Check “https” and uncheck all other schemes.
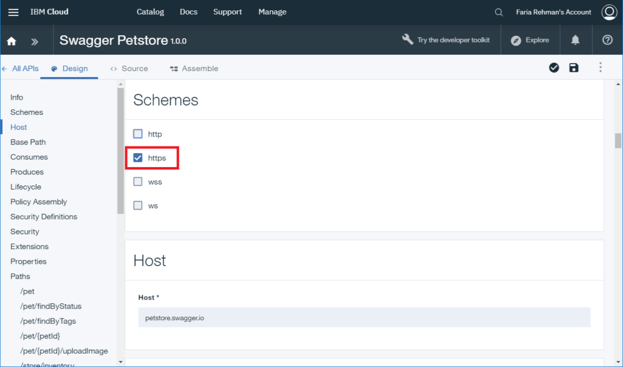
3. Save the changes.
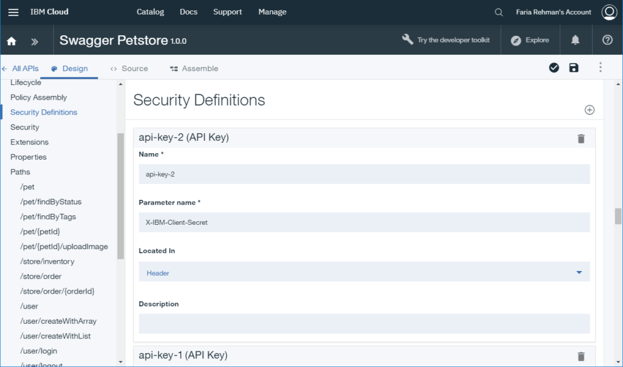
Add IBM Authentication Headers
The authentication mechanism used by APIs in IBM’s platform requires two API keys passed as headers namely X-IBM-Client-Id and X-IBM-Client-Secret. You will need to manually define these to avoid issues.
1. Navigate to the “Security Definitions” section in the “Design” tab.
2. Remove any existing security definitions that may have been added during the import process.
3. Add two “API Key” parameters with “Parameter name” specified as X-IBM-Client-Id and X-IBM-Client-Secret respectively. Both the parameters should be “Located In” the “Header”.
4. In the “Security” section enable both these API keys.
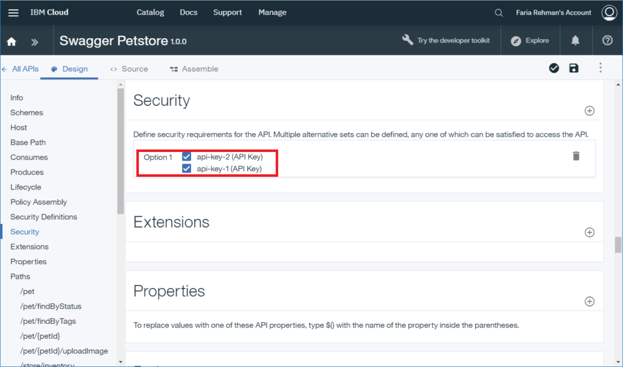
5. Save the changes.
What’s next?
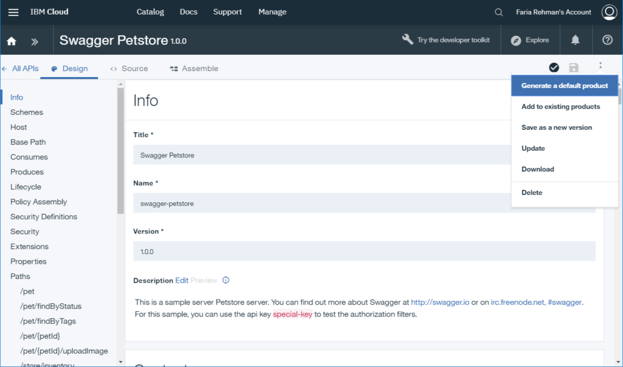
You are now ready to use your API in IBM API Connect to its full potential. Start by adding your API to a default product and publishing that to a catalog. From here on, you can start testing your API, generate a developer portal or utilize other features based on your needs.
Continue reading:
a) Part 1 of API Transformer Recipes: Enabling Postman’s Team Sharing Features for OpenAPI Users
b) Part 2 of API Transformer Recipes — Facilitating Migration from SOAP to REST
c) Part 4 of API Transformer Recipes — Moving to GraphQL from SOAP or REST
d) Part 5 of API Transformer Recipes — The Whys and Hows of Exposing a SOAP Service Using Your REST API